Miro App Prototyping Kit
During the Validation Phase of the Business Design Process, we run experiments with software prototypes to learn from our customers. To build a prototype, the team first needs a shared understanding of what we’re creating: how it should work, what it should look like, and what the user flow will be. Communicating this clearly to the prototyper can be challenging (especially for non-technical teams or less experienced prototypers). To make this step easier, we’ve created a Prototyping Kit for Mobile Apps in Miro. It’s simple to use and helps innovation teams quickly sketch, align on ideas, and prepare an initial prototype. On this page, you’ll find an overview of the kit and guidance on how to use it effectively.

Markus Sorg
Business Design Prototyper
1. Overview
There are many prototyping tools available, but over the years we’ve learned that we need something truly universal. Something everyone can use without training, setup, or prior design experience. None of the existing tools fully met those needs.
That’s why we built our own Prototyping Kit for Mobile Apps directly in Miro, a platform most of us already use every day. The kit includes:
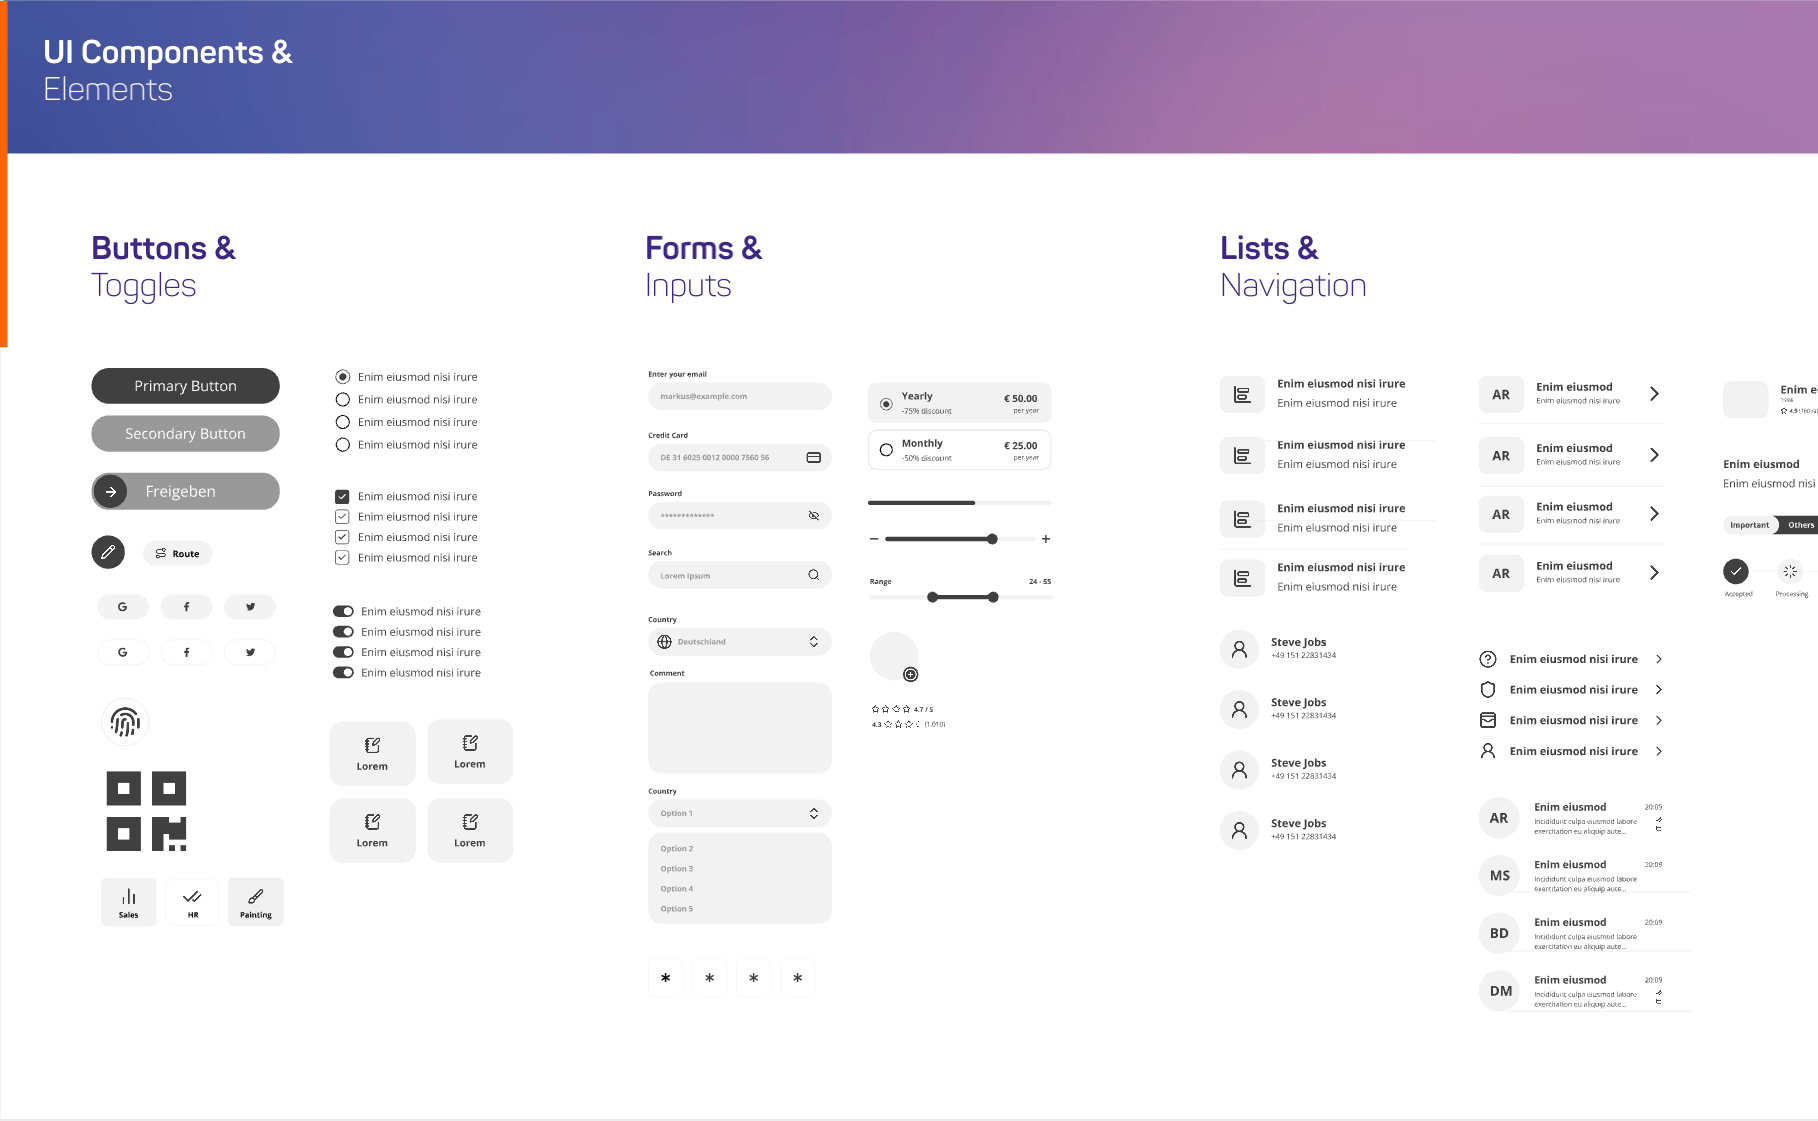
Predefined UI elements and components
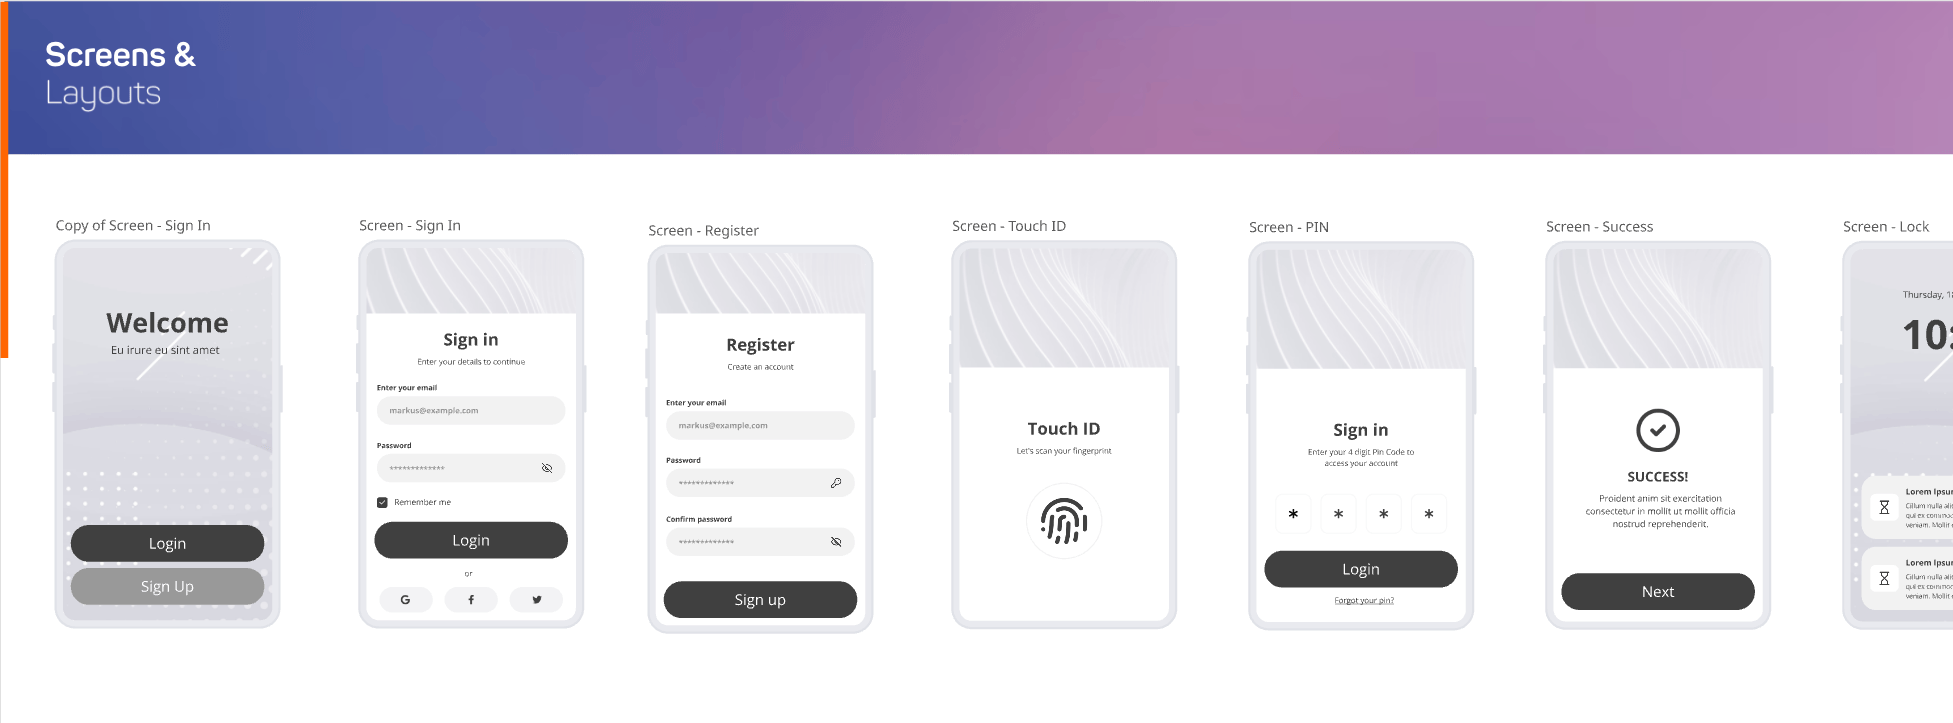
Ready-to-use screens and layouts
A large icon library
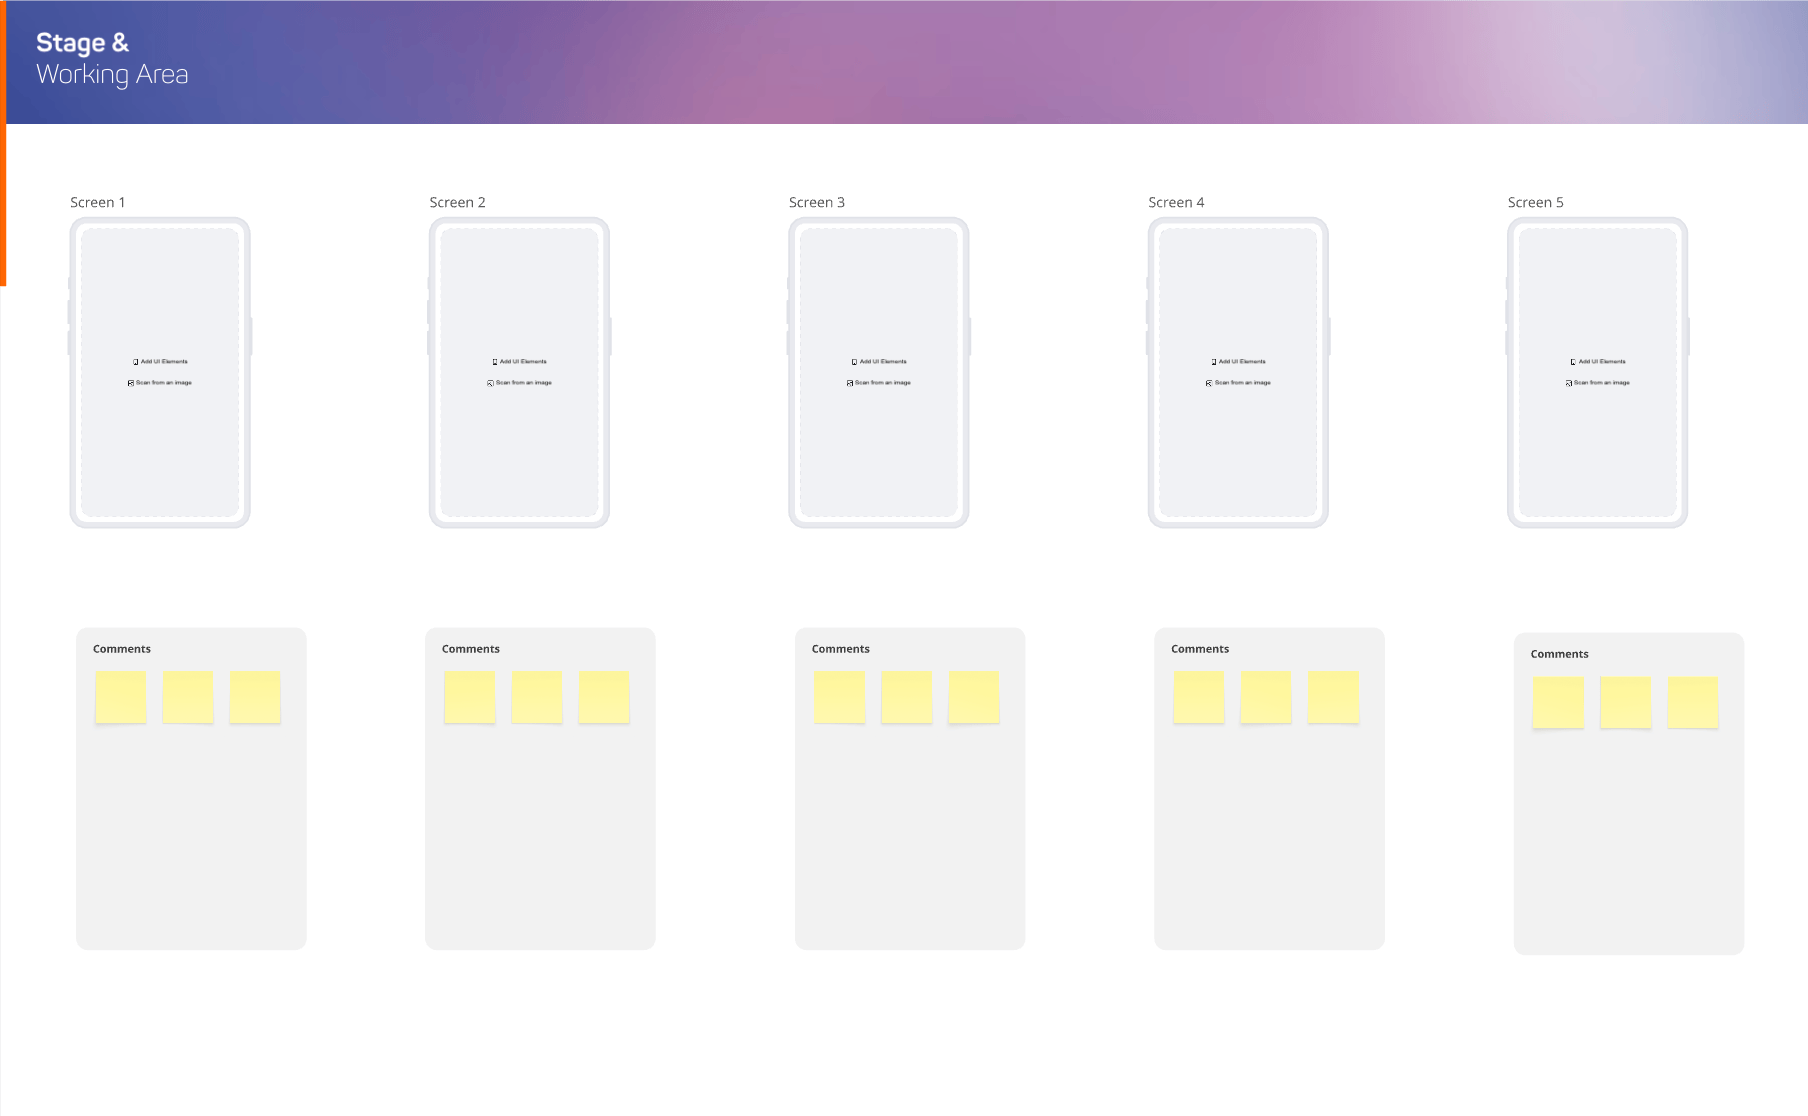
A working stage with app frames for sketching mobile UIs
With Miro’s built-in prototyping features, these sketches can also be linked together to create clickable, interactive prototypes.
2. Key Elements
UI Elements & Components
The kit includes a wide range of predefined UI elements and components that cover the most common patterns in mobile app design. From basic building blocks like buttons, toggles, forms, and input fields to more advanced components such as charts and calendars, everything is ready to use.
You can drag and drop these elements as they are, or easily adapt them to your needs. This saves time and lets you focus on designing flows and screens—without having to recreate the basics from scratch.

Best Practices
Start with what’s already there. Before creating your own element, check if a suitable component already exists in the kit.
Focus on speed, not perfection. Don’t spend too much time tweaking components—prototypes don’t need to be pixel-perfect.
Keep it simple. Use only the elements you need to get your idea across—avoid unnecessary details that distract from the flow.
Screens & Layouts
The kit also includes a set of ready-made screen types and layouts that you can use as a starting point. From simple but essential pages like login and registration, to more complex screens, these templates help you move faster. You can adapt them to fit your idea and quickly assemble the key screens your prototype needs. Without starting from a blank canvas.

Best Practices
Start with templates, then adapt. Use the predefined screens as a foundation and adjust them to fit your prototype.
Don’t reinvent the basics. Reuse standard screens (like login or registration) to save time and keep your focus on the unique parts of your app.
Icons
To give your prototypes a more visual touch, the kit includes the Lucide icon set. Lucide is a large, modern collection of icons with 1634 icons. All icons are fully searchable within Miro: simply press CTRL + F on the board and use the arrow keys to jump directly to the icon you need.
This makes it quick and easy to find the right visual element without breaking your flow.
Best Practices
Search efficiently. Use Miro’s search (CTRL + F) to quickly find the icon you need.
Don’t overthink it. Pick an icon that works and move on—prototyping is about speed, not perfection.
Use icons with purpose. Add icons only when they make the interface clearer or easier to understand.
The Stage
The stage is where you assemble your prototype. Simply drag and drop UI elements, components, or screens into the mobile frame and adjust them as needed. You can also make your prototype clickable by defining interactions: select an element, then use the blue circle to draw an arrow to the screen it should link to.
To view your prototype in action, select a screen and click “Preview” in the popover menu to open it in full screen.

Best Practices
Add context with comments. Use comments to provide clarifying notes or instructions for your team.
Make space when needed. Extend the phone frame vertically if you need more room. Full-screen preview will allow scrolling.
Link your screens. Connect screens with interactions to make the prototype clickable and easier to test.
Keep it simple. Focus on clarity and intent, not on pixel-perfect details. The goal is shared understanding.
7. Instructions for Coaches
Keep the goal in focus. Continuously remind the team what the experiment is about: What do we want to learn, and what do we need to build in order to learn it?
Prioritize wisely. Ensure the team spends most of their time on the screens that matter most. Teams often get sidetracked by less important details.
Support with expertise. Involve an experienced prototyper who knows how to work with innovation teams and early-stage prototypes.
Facilitate collaboration. Create space for all voices to be heard and guide discussions so the team aligns quickly without getting bogged down.
8. Miro Board
Here you can find the Miro-Board with the Kit. Drop us a line, if you need editing rights to use it in your own workshops.
Have a look at it: https://miro.com/app/board/uXjVJUco7rw=/
