Prototyping Physical Products
For those team members who have the task to create prototypes of physical products this article will give you orientation in deciding about the level of reality and the kind of prototype needed to support customer interaction experiments or rather technical experiments.
Content
1. Purpose
In some cases part of the offering you have defined in the Design Phase will be a physical product. It makes a lot of sense to already start here with prototyping this physical product to align ideas and thoughts within the team. It is much easier to discuss ideas when being able to point onto something. Even the simplest hand drawing mitigates the effect of talking about something while having very different interpretations within the team and not realizing it.
Further on in the Validate Phase, you will have designed experiments in order to investigate, ideally mitigate, the most crucial uncertainties in the business model. Most likely, you will be conducting experiments to get an impression of how a potential customer or user reacts to your offering. Especially in consumer markets, you need a rather high level of reality in your prototypes in order to get valid feedback and to circumvent the risk that interviewees
simply don't understand the offering itself
react more to imperfections of the prototype than to the idea of the offering
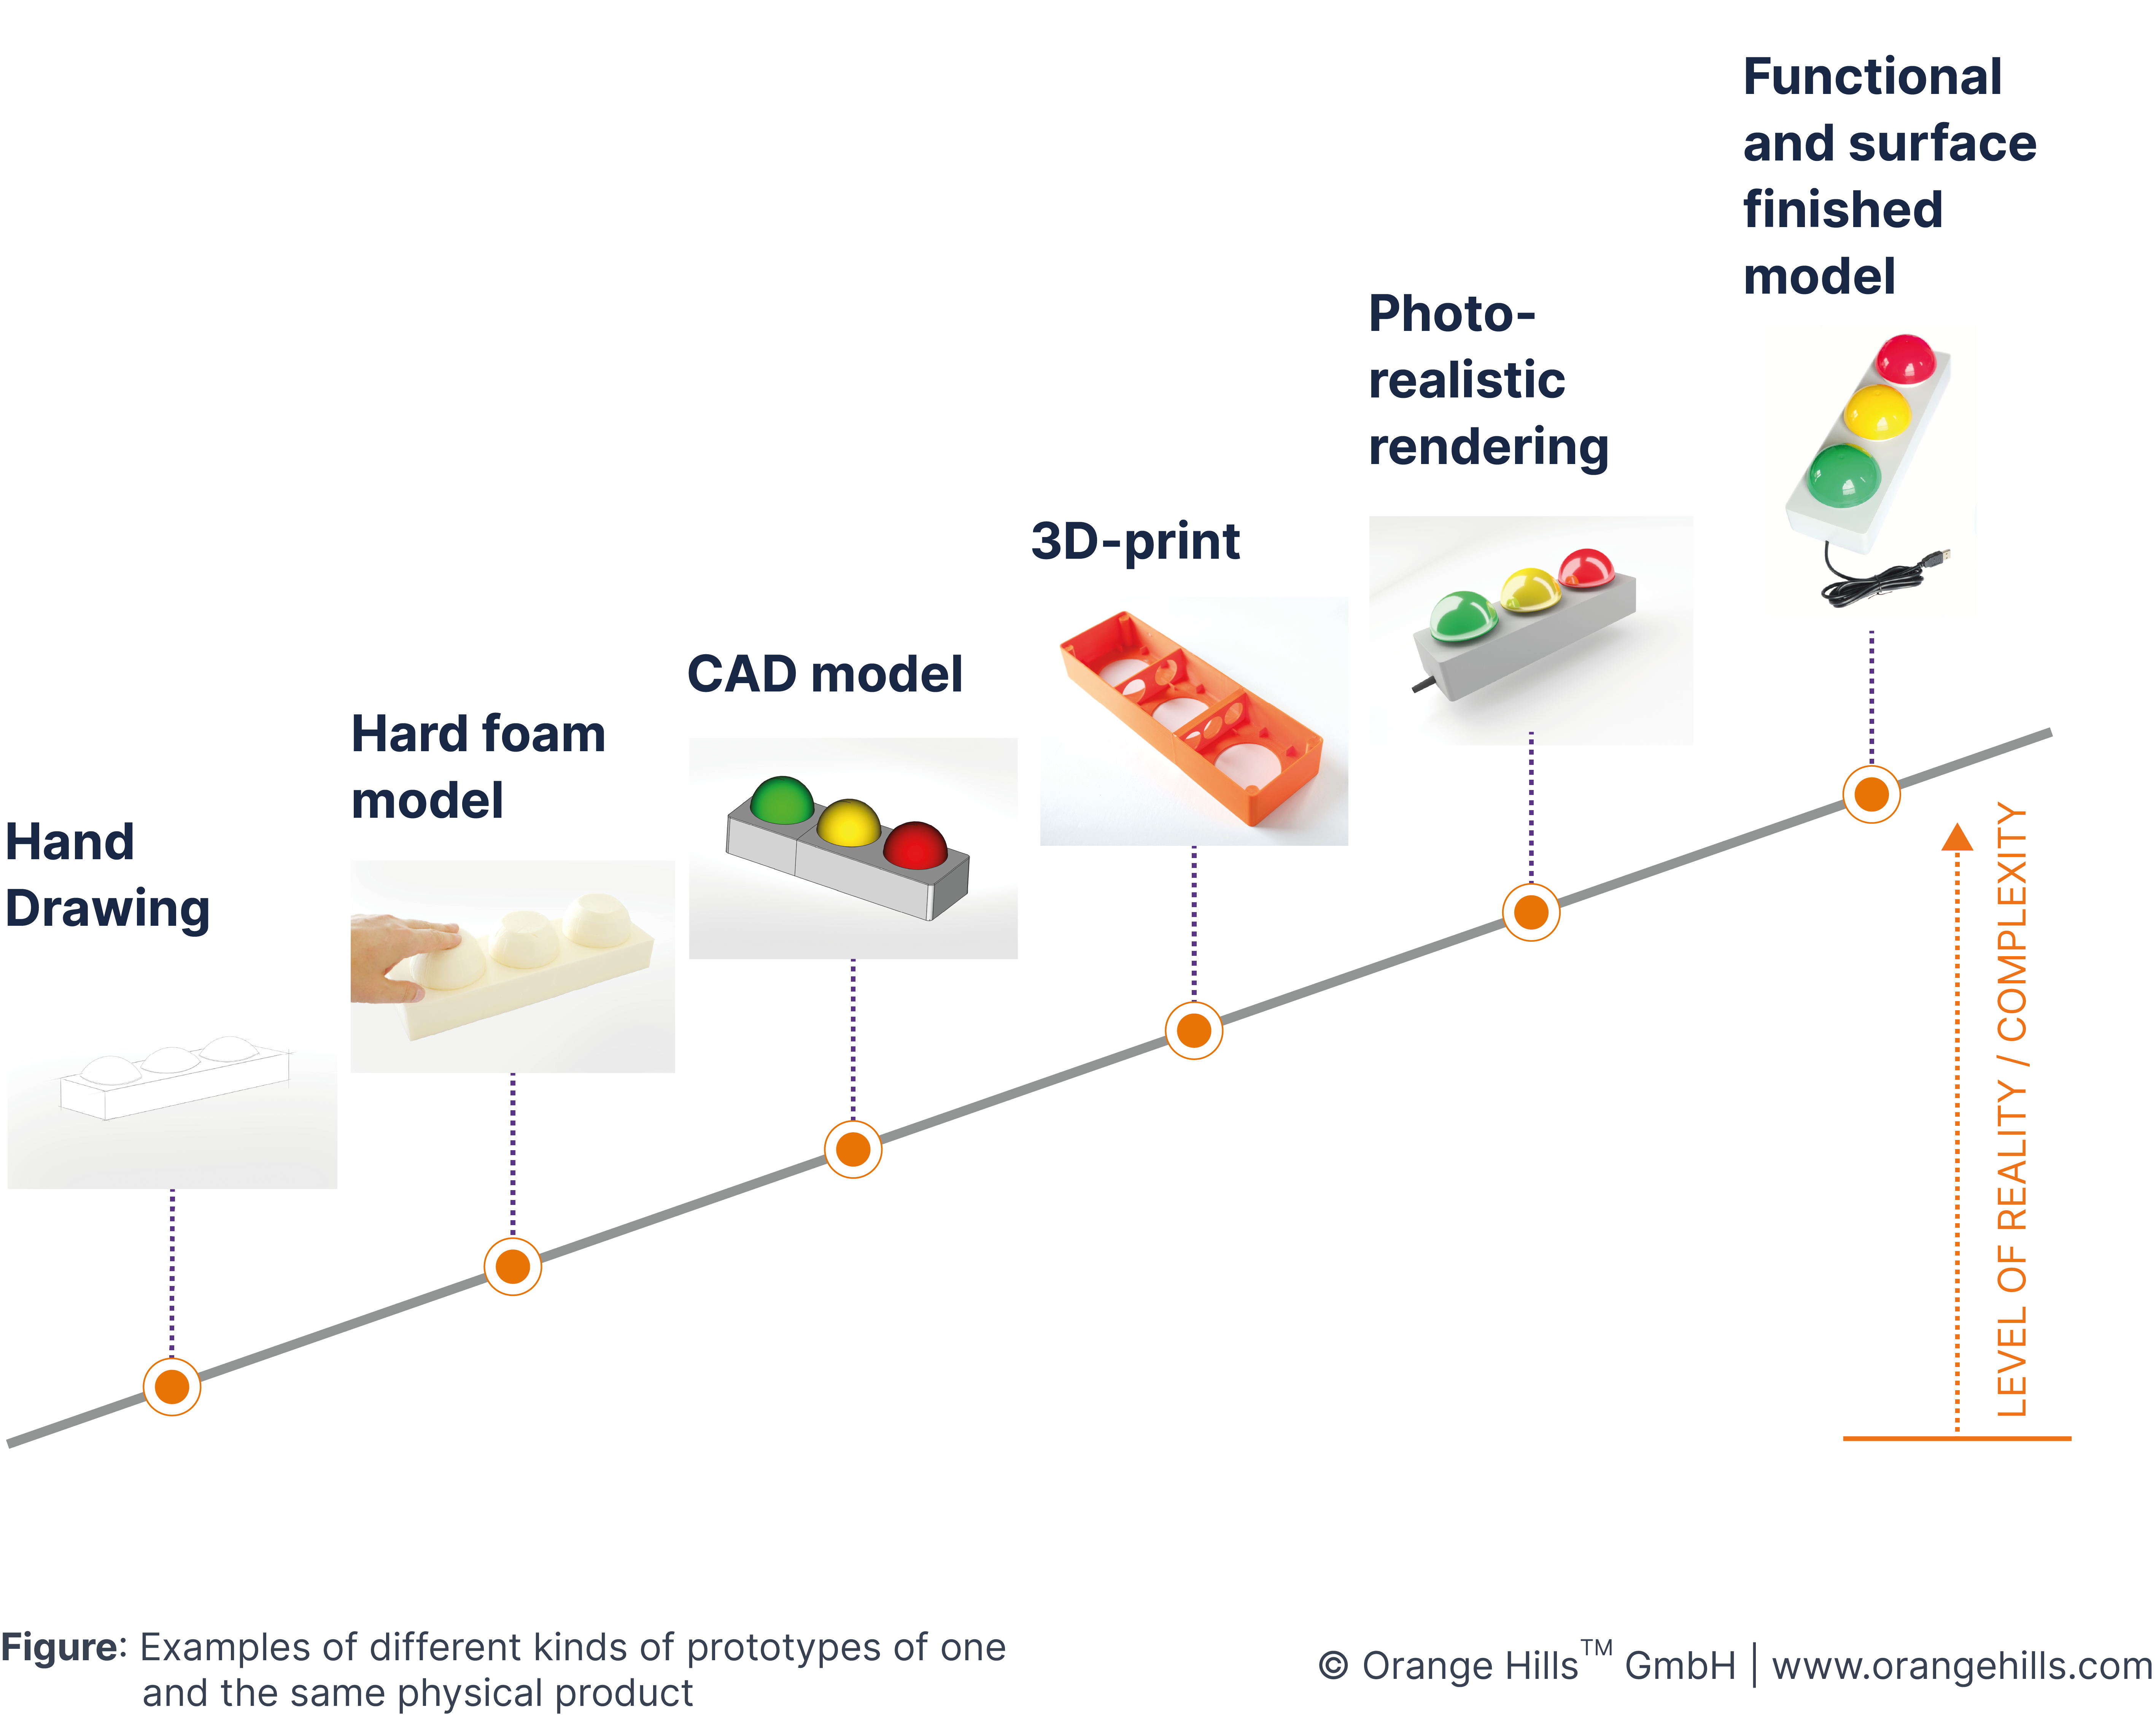
2. Types
In case of a product prototype, we usually distinguish between look & feel prototypes and functional prototypes. Look & feel prototypes help you to present visual and haptic characteristics of your product:
Drawing / sketch
Haptic model
Virtual 3D model & printout
Design prototype
Functional prototypes help you get answers to open questions around the feasibility of certain mechanical components or the applicability of certain materials or components. Examples for functional prototypes are:
Mechanical prototype
Construction model
Structural engineering calculation
Material prototype
Sketches / drawings
Sketches are the simplest and fastest way to depict something physical we have in mind. The great thing about sketching is that everyone can sketch anywhere and that, in prototyping, the quality of a sketch is defined by fulfilling a purpose and not by the technical skill. The purpose is to either support us in detailing own thoughts about aspects of a physical product or to share thoughts about it with others.
Most often sketches are made in the Design Phase (see Visualising Ideas) when we design aspects of the offering and when we want to clarify questions like
"What could a physical component look like and how could a user interact with it?"
"Do we have the same understanding in our team of our solution?"
Prototyping Cheat Sheet
Purpose: Thinking tool
Recipients: Project team, partners
Tools & material: pen & paper, tablet
Fidelity / level of reality: Low
Learning method: Visual Concretisation
CAD Model
Once a rough layout of a physical product or component of the offering we have in mind exists, we usually feel the need to refine our view on it. This could be a good time to get into CAD modelling. Besides the three dimensional view, a good thing about CAD models is that properties of the model are changed with the blink of an eye when trying different variations.
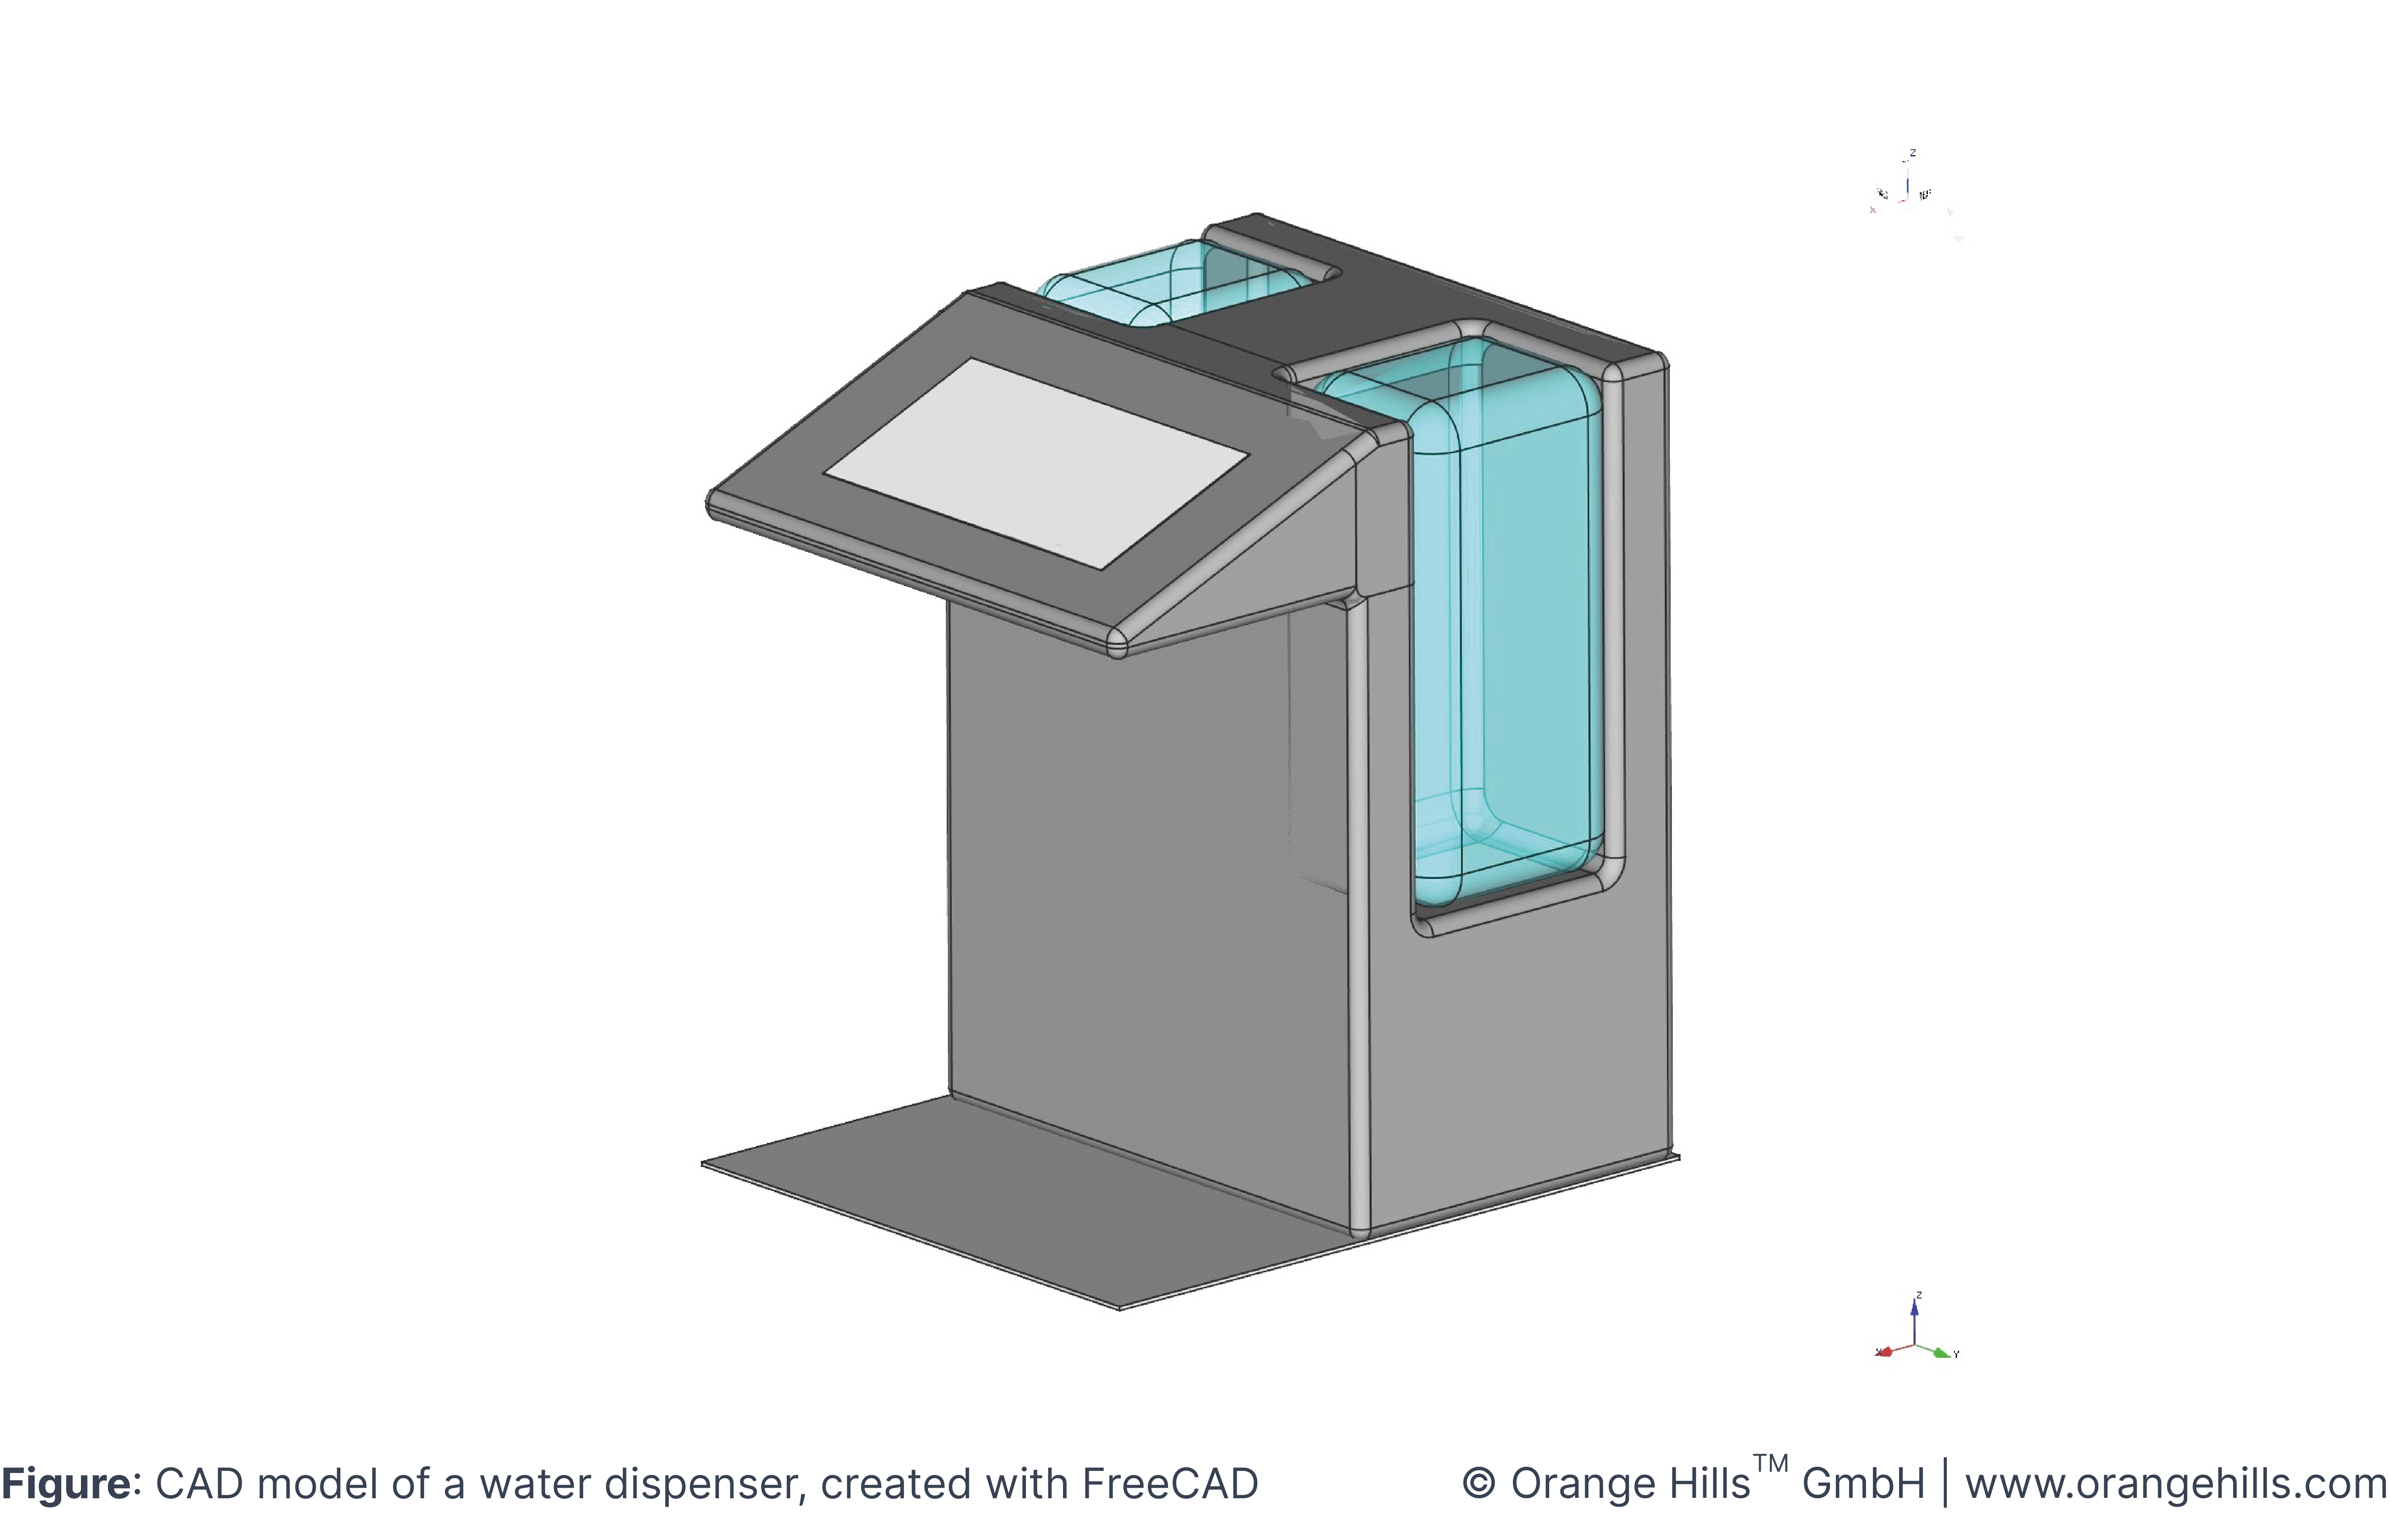
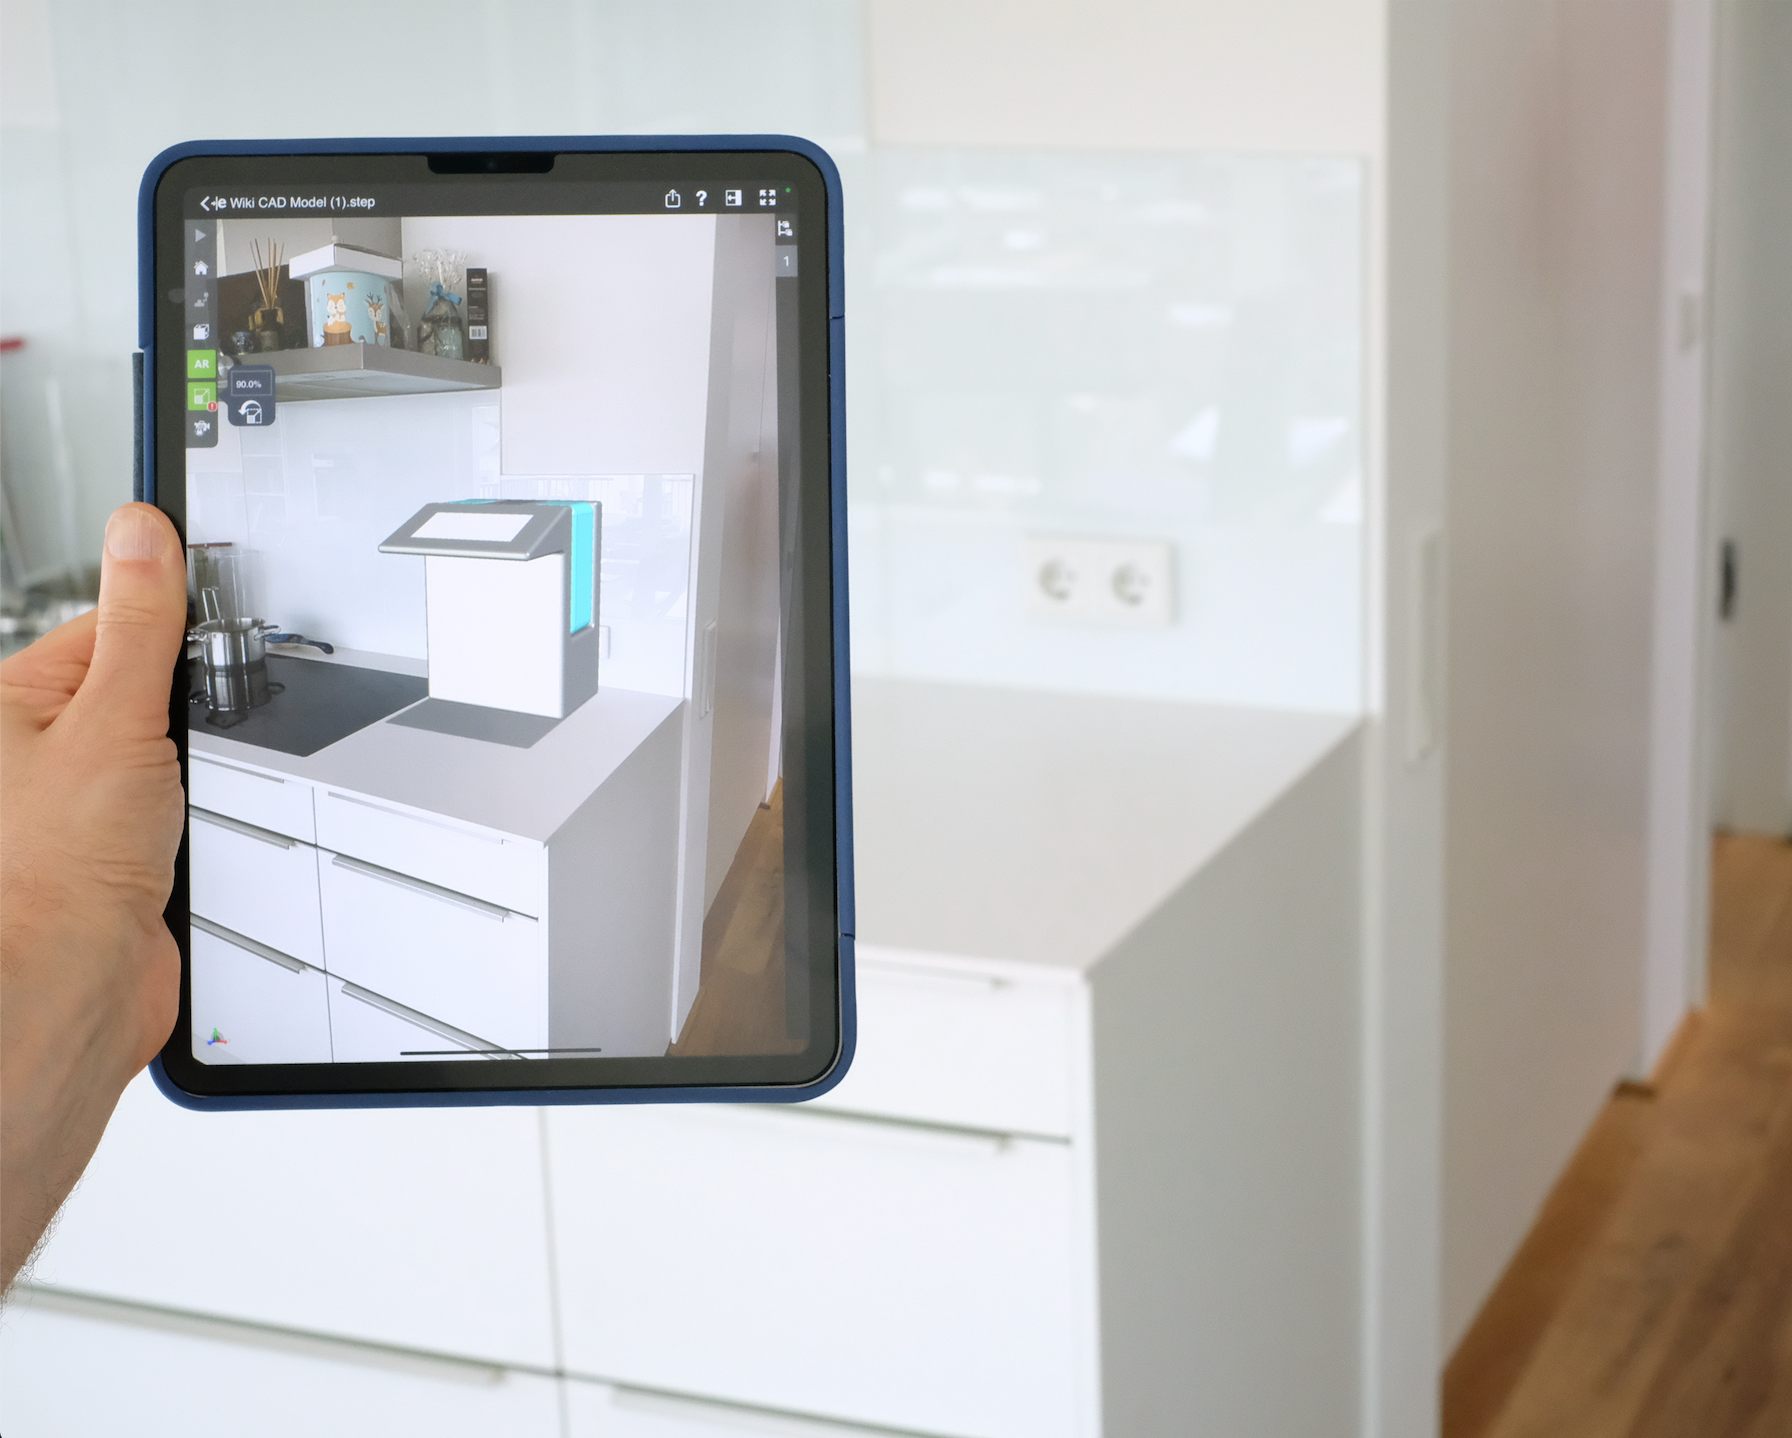
Digital three-dimensional CAD models can easily be placed in a real physical environment in real-time through common AR tools. This increases the level of reality and speeds up decision processes when discussing aspects of a future physical product.
CAD models help to clarify questions like
"How do proportions of dimensions look like?"
"How does it look like from different viewing angles?"
Prototyping Cheat Sheet
Purpose: Thinking tool
Recipients: Project team, partners
Tools: 3D CAD Software, AR tools
Fidelity / level of reality: Medium
Learning method: Visual Concretisation
And, CAD models serve as a geometric basis for photorealistic renderings.
Rendering
In most cases we want to interact with potential customers and users in order to get specific feedback for aspects of our offering. For this purpose our prototypes need to have a rather high level of reality. In contrary to software, where a high level of reality is reached more easily, this is a lot more difficult for physical products. To create a physical prototype with a high level of reality usually is time consuming and costly. And in many cases we simply don't need a physical prototype at all to get specific customer or user feedback. Photorealistic renderings are high-fidelity digital depictions of physical products and environments which often cannot be distinguished from reality anymore. Renderings are very handy as prototypes when our experiments aim at
interacting with real customers who are not involved in the process of product development
testing customer behaviour regarding purchase decisions
testing consumer reactions (consumers are often distracted by a non-perfect appearance of a product than other types of customers)
Renderings help to clarify questions like
"Does a potential customer see a value in our idea?"
"Will a potential customer like to use our offering and show Customer Commitment?"
Prototyping Cheat Sheet
Purpose: Interaction tool
Recipients: Customers, users, investors of any kind
Tools: Rendering software and surface libraries
Fidelity / level of reality: High
Learning method: Visual Concretisation, Interview with prototype
Haptic Model
Usually, when we have an idea of a physical object that we want to develop, we want to see it in real life as soon as possible. And, dependent on the object, we want to have it in our hands to feel it. The haptic experience is an additional experience to the visual one. The direct interaction with on object in our hands gives us the highest possible relation to it and allows us to clarify several questions at once, for example
"How does the object look and feel in the respective situation?"
"How do dimensions and proportions look like?"
"How does the shape integrate in a specific environment?"
Prototyping Cheat Sheet
Purpose: Thinking tool, Interaction tool
Recipients: Team members, sponsors, customers / users
Materials: any material the prototyper is familiar with (e.g. cardboard, foam, wood, clay, 3D-printer)
Fidelity / level of reality: low to medium
Learning method: Haptic Experience, Interview with Prototype
Functional Model
At a later stage in a Business Design Sprint we usually go out there and show our customers a rather high-fidelity prototype to investigate the acceptance. Not only the acceptance of a shape but also the acceptance of the functionality.
The direct interaction of customers with our functional prototype gives us the opportunity to clarify questions such as
"Does our customer get excited when using the prototype?"
"How does our customer interact with it?"
"Is a customer willing to invest into the idea?"
A nice side-effect is that by creating high-fidelity prototypes teams experience a maximum of identification with their idea.
Prototyping Cheat Sheet
Purpose: Interaction tool
Recipients: Sponsors, customers / users
Materials: Most commonly 3D-printed materials such as PLA or ABS with surface finish. Electronics if needed.
Fidelity / level of reality: high
Learning method: Interview with Prototype
4. Participants
5. Tools & Materials
Check our page Tools for Prototyping Physical Products
6. Instructions for Coaches
Ask the sprint team members already in the Discover Phase about experience with prototyping techniques and skills. This will shorten the discussion who will do what when it comes to prototyping in the Design Phase, Validate Phase or Decide Phase.
Make sure that within the team it is very well understood what the team wants to find out by the help of a prototype. Better invest a little bit more time discussing the needed type of prototype than investing time into a prototype that does not answer the respective question. Always try to find the easiest and fastest way to get to the answers needed.
When planning a prototype take into account available capabilities either in the team or of availabe prototyping experts right from the beginning.
Be wary when technical experts / an engineering department in an organisation creates prototypes. These prototypes are often way too perfect and time-consuming to create. Simply because for other purposes in the organisation prototypes to fulfil different purposes. In a Business Design Sprint, however, prototypes need to be lean.
7. Q & A
What level of reality should we go for with our protoype? High level of reality usually means high effort in prototype creation. Therefore, always go with the lowest necessary level of reality to still get the insights you need. Usually, when interacting anonymously with non-briefed potential customers the level of reality needs to be rather high than on the opposite to communicate an idea within the team only.
Shall we better use photo-realistic renderings or physical prototypes to interact with a potential customer? This depends on how you will interact with potential customers, anonymously via a Landing Page or in direct contact face-to-face. Bringing potential customers in contact with a prototype of a physical product through a Landing Page can only happen through photographs or renderings. If you have the chance to interact in a face-to-face situation with potential customers, a physical prototype might offer a higher level of reality than e.g. a sales brochure with a rendering inside.